If you’re looking for a fun, mess-free way to serve a classic comfort food, mac and cheese cups are one of those recipes that just work, especially for kids. They’re easy to hold, perfectly portioned, and made with familiar flavors little ones already love.
Jump to RecipeWhether you need a simple lunchbox idea, a party snack, or a make-ahead dinner side, these baked mac and cheese cups check all the boxes without over complicating things.
Why Kids Love Mac and Cheese Cups
Traditional mac and cheese is delicious, but it’s not always the easiest thing for kids to eat. Turning it into individual mac and cheese servings solves that problem.
- Easy for small hands to hold
- Less spilling and scooping
- Familiar, comforting taste
- No strong or overpowering flavors
For picky eaters, the muffin-style shape often feels more fun and approachable than a bowl of pasta.
Ingredients You’ll Need

These ingredients are basic, affordable, and easy to find, nothing fancy, nothing overwhelming.
- Elbow macaroni
- Mild cheddar cheese
- Milk
- Butter
- Egg (helps the cups hold together)
- Salt
Tip for parents: Stick with mild cheeses. Sharp or aged cheeses can be too strong for kids and may affect texture.
Step-by-Step: How to Make Mac and Cheese Cups

Cook the Pasta Just Right
Boil the macaroni in salted water until just tender. Avoid overcooking, softer pasta can turn mushy once baked.
Make a Creamy Cheese Sauce Kids Love
Melt butter, stir in milk, then add shredded cheese slowly until smooth. Keep the heat low so the sauce stays creamy, not grainy.
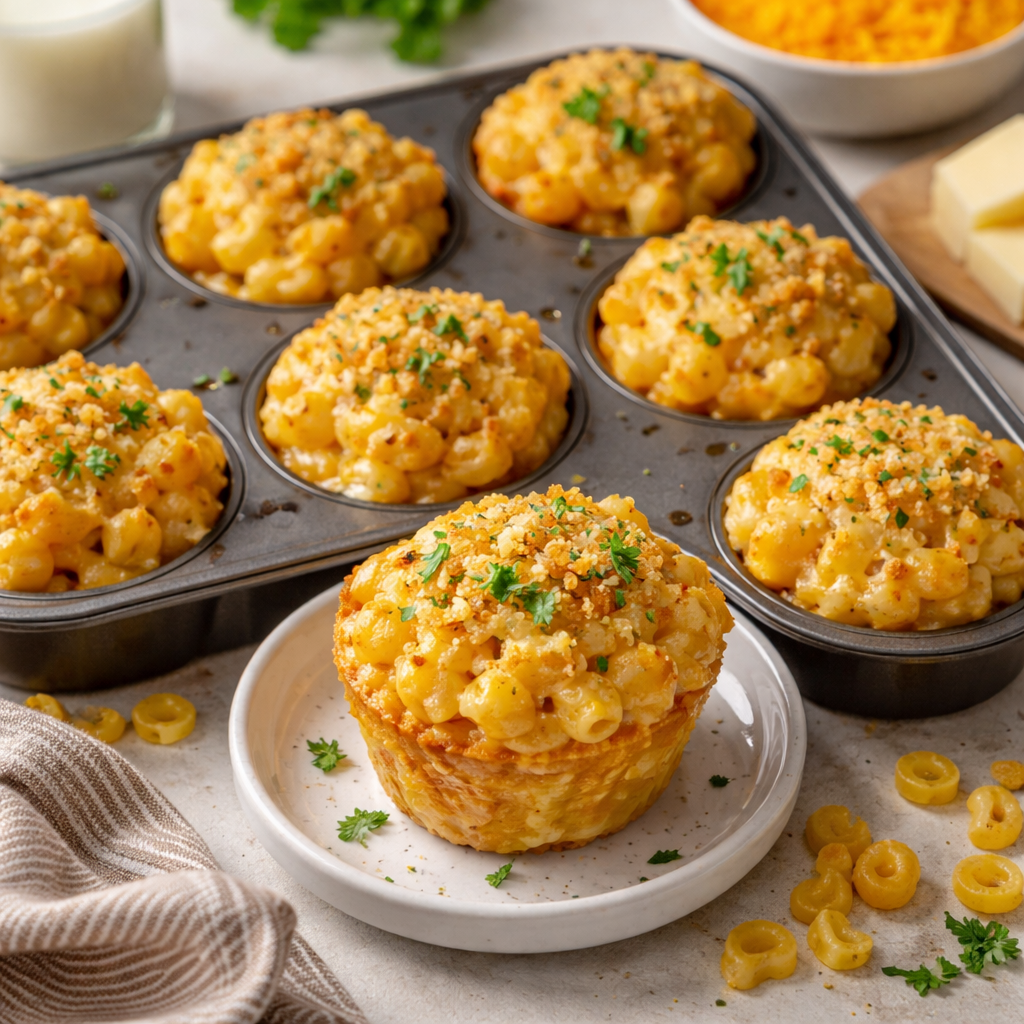
Assemble the Cups
Lightly grease the muffin tin, then mix the pasta with the cheese sauce and beaten egg. Spoon the mixture evenly into each cup.
Bake Until Lightly Golden
Bake until the tops are set and lightly golden. Let them cool for a few minutes so they release cleanly from the pan.
Best Cheese Choices for Kids
Not all cheese melts the same way, and not all flavors work for children.
Best options:
- Mild cheddar
- Colby-Jack
- Mozzarella (mixed with cheddar)
Avoid:
- Very sharp cheddar
- Blue cheese
- Strong smoked cheeses
These choices keep the mini mac and cheese cups creamy and familiar.
Variations Kids Actually Eat
- Extra cheesy: Add a little more cheese on top before baking
- Crunchy topping (optional): Light breadcrumb sprinkle for older kids
- Plain version: Skip toppings entirely for sensitive eaters
Simple changes work better than complicated add-ins when cooking for kids.
Make-Ahead, Storage & Reheating Tips
One reason parents love mac and cheese cups is how well they fit into busy schedules.
- Store in an airtight container in the fridge
- Freeze for longer storage
- Reheat gently so they stay soft
They’re great for meal prep and still taste good the next day.
Are Mac and Cheese Cups Good for Lunchboxes?
Absolutely. These cups were practically made for school lunches.
- Easy to pack
- Less mess than traditional mac and cheese
- Can be eaten warm or at room temperature
They also make great after-school snacks when kids come home hungry.
Common Mistakes Parents Make (And How to Avoid Them)
- Overbaking: dries them out
- Too much cheese: can cause oil separation
- Skipping cooling time: makes cups fall apart
A few small adjustments make a big difference.
FAQs Parents Ask
Can I make mac and cheese cups without eggs?
Yes, but they’ll be softer. Eggs help the cups hold their shape.
Can toddlers eat these?
Yes, just skip crunchy toppings and cut into smaller pieces if needed.
Can I freeze them?
Yes. These are freezer-friendly mac and cheese cups when stored properly.
Final Thoughts
These homemade mac and cheese cups are one of those reliable recipes you’ll come back to again and again. They’re simple, comforting, and designed with kids in mind, no complicated steps, no overwhelming flavors.
Whether you’re packing lunches, planning a party, or just trying to make dinner easier, this recipe fits effortlessly into family life.
Mac and Cheese Cups
Ingredients
Equipment
Method
- Preheat the ovenPreheat your oven to 375°F (190°C). Lightly grease the muffin tin and set aside.
- Cook the pastaBring a pot of salted water to a boil. Cook the elbow macaroni until just tender. Drain and set aside.
- Make the cheese sauceIn a saucepan over low heat, melt the butter. Add the milk and warm gently. Stir in the shredded cheese slowly until smooth and creamy. Remove from heat.
- Combine the mixtureIn a large mixing bowl, combine the cooked pasta and cheese sauce. Let cool slightly, then mix in the egg and salt until well combined.
- Assemble the cupsSpoon the mac and cheese mixture evenly into the muffin tin. If using breadcrumbs, sprinkle lightly on top.
- Bake until lightly goldenBake for 18 to 22 minutes, or until the tops are set and lightly golden.
- Cool and serveLet the mac and cheese cups cool for 5 minutes before removing from the pan. Serve warm.
Nutrition
Notes
- Use mild cheese only to avoid strong flavors
- Skip breadcrumbs for toddlers
- Let cups cool slightly before serving for better texture
- These cups can be eaten warm or at room temperature, making them great for lunchboxes.