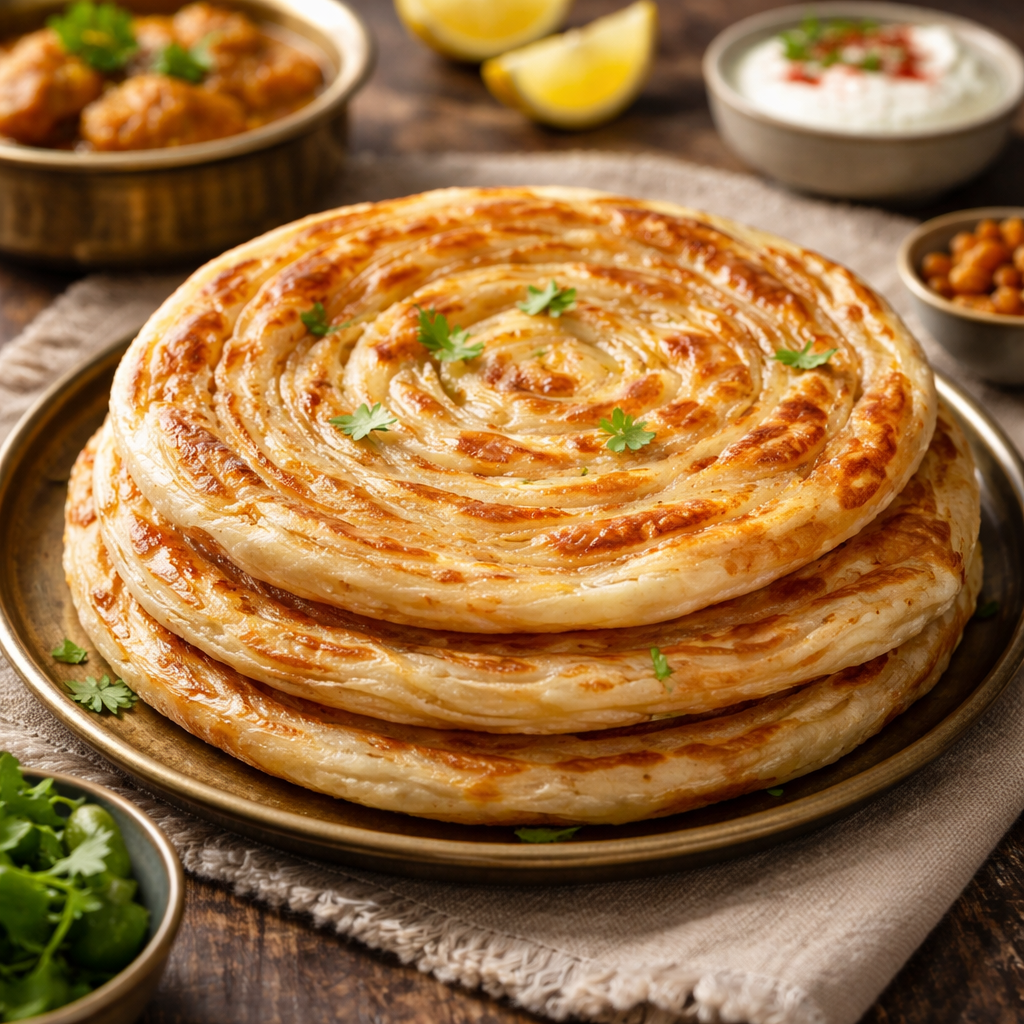
There’s something irresistible about a freshly cooked lacha paratha, crisp on the outside, soft inside, and packed with delicate, flaky layers. Often called lachha paratha or laccha paratha, this layered flatbread is a staple in Indian and Pakistani cuisine, especially in North Indian and Mughlai-inspired meals.
Jump to RecipeThe good news? You don’t need a restaurant kitchen or expensive ingredients to make restaurant style lacha paratha at home. With simple pantry staples and the right technique, you can create crispy lacha paratha that rivals your favorite dhaba, at a fraction of the cost.
Why Make Lacha Paratha at Home Instead of Buying It?
Ordering layered paratha from a restaurant adds up quickly. Making it at home:
- Uses affordable staples like flour, salt, and oil
- Requires no fancy equipment
- Lets you control the texture, soft, flaky, or extra crispy
- Tastes fresher and healthier
When you learn how to make lacha paratha, you’re not just saving money, you’re mastering a technique that works for countless meals.
Ingredients You Need (Simple & Affordable Pantry Staples)
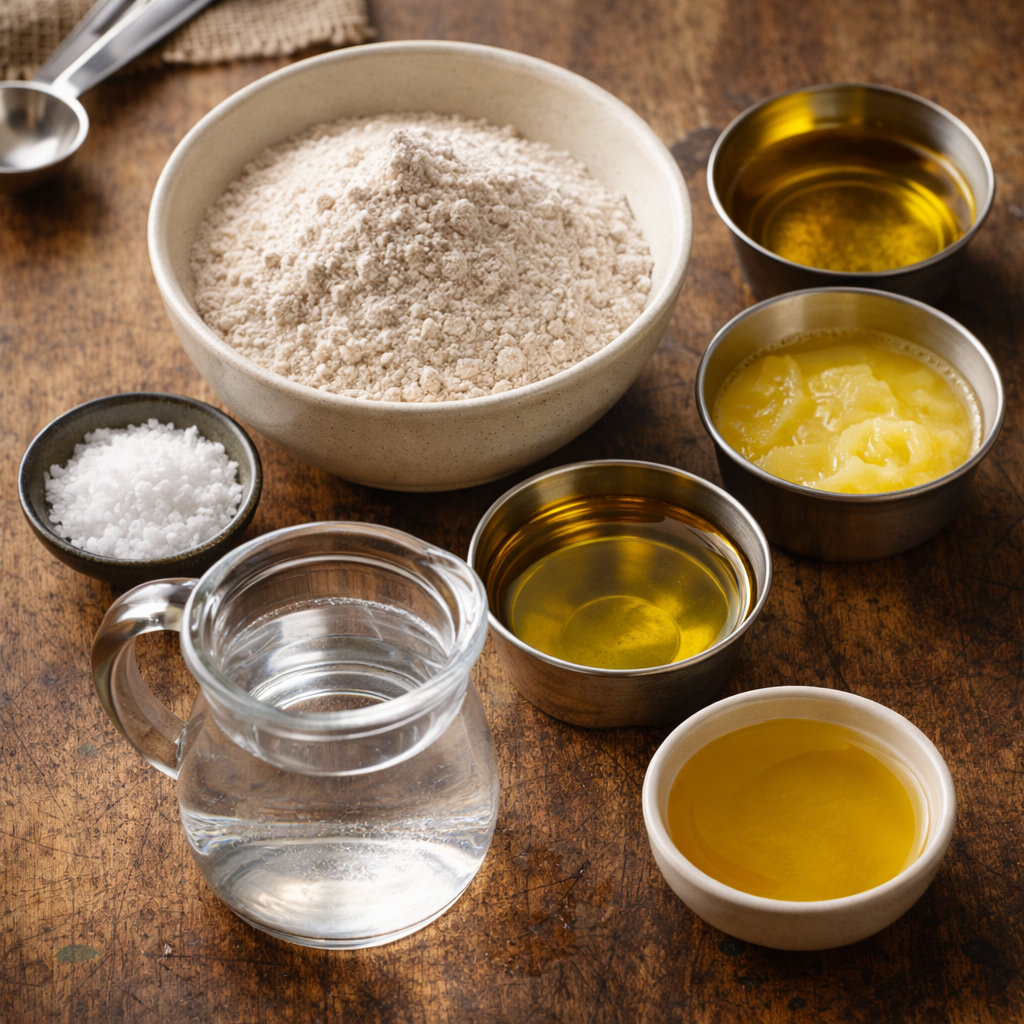
This lacha paratha recipe keeps things simple.
- 2 cups whole wheat flour (atta)
- ½ teaspoon salt
- 1 tablespoon oil (for dough)
- ¾ cup water (adjust as needed)
- 2 to 3 tablespoons oil or ghee (for layering and cooking)
Budget Substitutions & Smart Swaps
- You can use all-purpose flour for softer layers.
- Oil works perfectly if you don’t want to use ghee.
- This recipe is naturally egg-free and can be made vegan.
Whether you’re making lacha paratha with whole wheat flour or mixing flours, the key is proper dough consistency.
Understanding the Layers (Why Lacha Paratha Becomes Flaky)
The magic of flaky paratha lies in technique:
- Kneading develops gluten, creating elasticity.
- Resting the dough relaxes it for easier rolling.
- Spreading oil between folds separates thin layers.
- The spiral or coil method creates the signature texture.
If you’ve ever wondered how to get layers in paratha, it all comes down to thin rolling and proper folding.
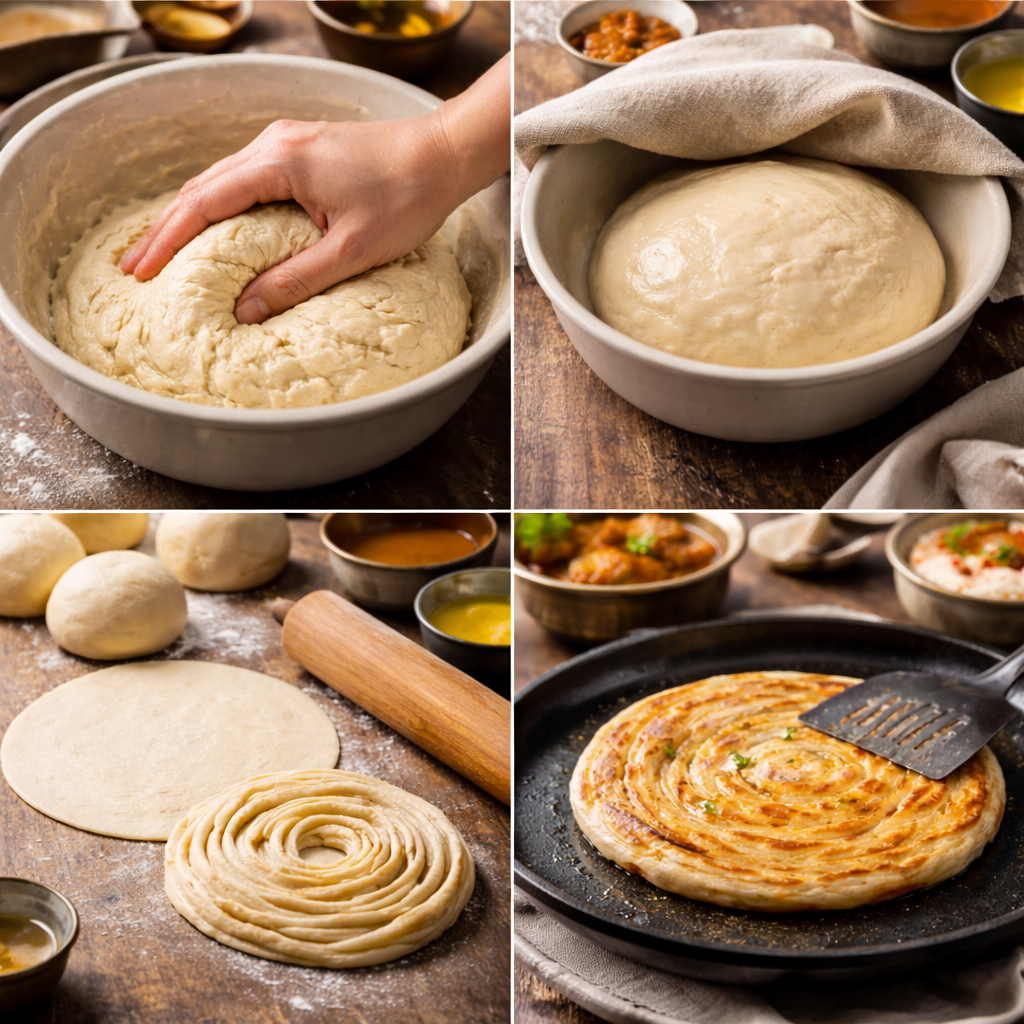
Step-by-Step: How to Make Lacha Paratha
Step 1 – Make Soft Elastic Dough
Mix flour and salt. Add oil, then slowly incorporate water. Knead for 8 to 10 minutes until smooth and elastic.
The dough should feel soft but not sticky. Proper hydration ensures soft, layered paratha later.
Step 2 – Rest for Better Texture
Cover and rest for at least 20 to 30 minutes.
Skipping this step is one reason lacha paratha is not flaky.
Step 3 – Roll & Create Spiral Layers
Divide dough into balls. Roll thin, almost translucent.
Spread oil evenly.
Pleat like a paper fan, then roll into a tight coil (Swiss-roll style).
Step 4 – Flatten Without Losing Layers
Gently flatten the coil and roll lightly. Don’t press too hard, that ruins the layers.
If you’re learning how to roll lacha paratha properly, remember: thin but gentle.
Step 5 – Cook on Medium Heat
Place on preheated tawa.
Cook until light bubbles form, flip, brush oil, and cook until golden brown spots appear.
For crispy lacha paratha, press gently with a spatula while cooking.
Common Mistakes That Ruin Flaky Layers
- Overworking dough
- Not resting enough
- Rolling too thick
- Using too much dry flour
- Cooking on high heat
If you’re asking, “Why is my lacha paratha not layered?” — usually it’s heat control or thickness.
How to Make It Extra Crispy (Street Style Technique)
For street style lacha paratha:
- Cook once until lightly done.
- Remove and rest 1 minute.
- Cook again briefly with a little extra oil.
This double-cook method enhances the crispy outside while keeping the inside soft.
Storage, Freezing & Reheating Guide
You can absolutely meal prep this layered paratha recipe.
- Freeze raw coils (before rolling final time).
- Freeze half-cooked paratha between parchment.
- Reheat on skillet, avoid microwaving to preserve crisp texture.
Yes, you can freeze lacha paratha dough — just wrap tightly.
Serving Ideas (Budget Meal Pairings)
This authentic lacha paratha pairs beautifully with:
- Dal makhani
- Simple chicken curry
- Yogurt & pickle
- Leftover vegetables for a quick wrap
Because this is a versatile Indian flatbread and Pakistani flatbread, it fits breakfast, lunch, or dinner.
Frequently Asked Questions
What’s the difference between lacha paratha and plain paratha?
Plain paratha lacks the spiral layering method that gives lacha paratha its flaky texture.
Can beginners make this?
Yes, this easy lacha paratha method is beginner friendly if you follow resting and rolling tips.
Can I make it healthier
Use whole wheat flour and reduce oil brushing.
Can I make restaurant style lacha paratha without maida?
Absolutely, whole wheat works beautifully.
Final Thoughts
Learning how to make flaky lacha paratha at home is simpler than it looks. With basic ingredients, proper dough kneading, and careful layering technique, you can enjoy restaurant style lacha paratha anytime, without stretching your budget.
Once you master this layered flatbread, it becomes a staple in your kitchen. Soft inside, crispy outside, and packed with beautiful layers, this homemade lacha paratha proves that affordable cooking can still feel luxurious.
Restaurant Style Lacha Paratha
Ingredients
Equipment
Method
- In a large bowl, combine whole wheat flour and salt. Add oil and mix lightly. Gradually pour in water while mixing.Knead for 8 to 10 minutes until the dough becomes smooth and elastic. It should feel soft but not sticky.
- Cover the dough with a clean kitchen towel. Let it rest for at least 20 to 30 minutes.Resting relaxes gluten and helps create soft, flaky layers later.
- Divide dough into 6 equal balls.Roll one ball into a thin circle, almost translucent. Dust lightly with flour if needed.
- Spread a thin layer of oil or ghee over the rolled dough.Pleat the dough like a paper fan. Then roll the strip into a tight spiral (Swiss-roll style).Tuck the end underneath.
- Press the spiral gently with your palm.Roll lightly into a 6 to 7 inch circle. Do not press too hard to preserve layers.
- Heat a tawa over medium heat.Place paratha on hot tawa. Cook until light bubbles appear. Flip and brush oil on top.Flip again and cook until golden brown spots appear on both sides.Press gently with a spatula for crispier edges.
- Remove and lightly crush between palms to release visible flaky layers.Serve warm.
Nutrition
Notes
- If dough feels tight, add 1 to 2 teaspoons water.
- Do not skip resting time.
- Medium heat is key, high heat burns layers before cooking inside.
- For extra crispy texture, cook briefly a second time.