If you’re looking for a reliable Instant Pot chicken and rice recipe that actually works every time, this one is it. It’s comforting, practical, and designed for busy days when you want a complete dinner without juggling multiple pans or overthinking cook times.
Jump to RecipeThis recipe is especially helpful if you’ve ever worried about mushy rice, dry chicken, or burn notices. Everything is cooked together in one go, using simple ingredients and a method that keeps the rice fluffy and the chicken tender.
Why This Recipe Works Every Time
Most Instant Pot chicken and rice recipes fail because they rush the process or ignore how rice behaves under pressure. This version works because:
- The liquid-to-rice ratio is carefully balanced
- Chicken cooks gently alongside the rice, not on top of it
- The sauté step builds flavor and prevents sticking
- Pressure release timing is intentional, not random
It’s designed for beginner Instant Pot users but still delivers the kind of texture you’d expect from a well-tested pressure cooker chicken and rice dinner.
Ingredients You’ll Need
These are everyday ingredients that cook evenly and hold their texture well under pressure.
- Boneless chicken (breast or thigh)
- White rice (basmati or jasmine works best)
- Chicken broth or stock
- Onion
- Garlic
- Carrots or mixed vegetables (optional)
- Olive oil or butter
- Salt, black pepper, mild spices
Step-by-Step Instructions
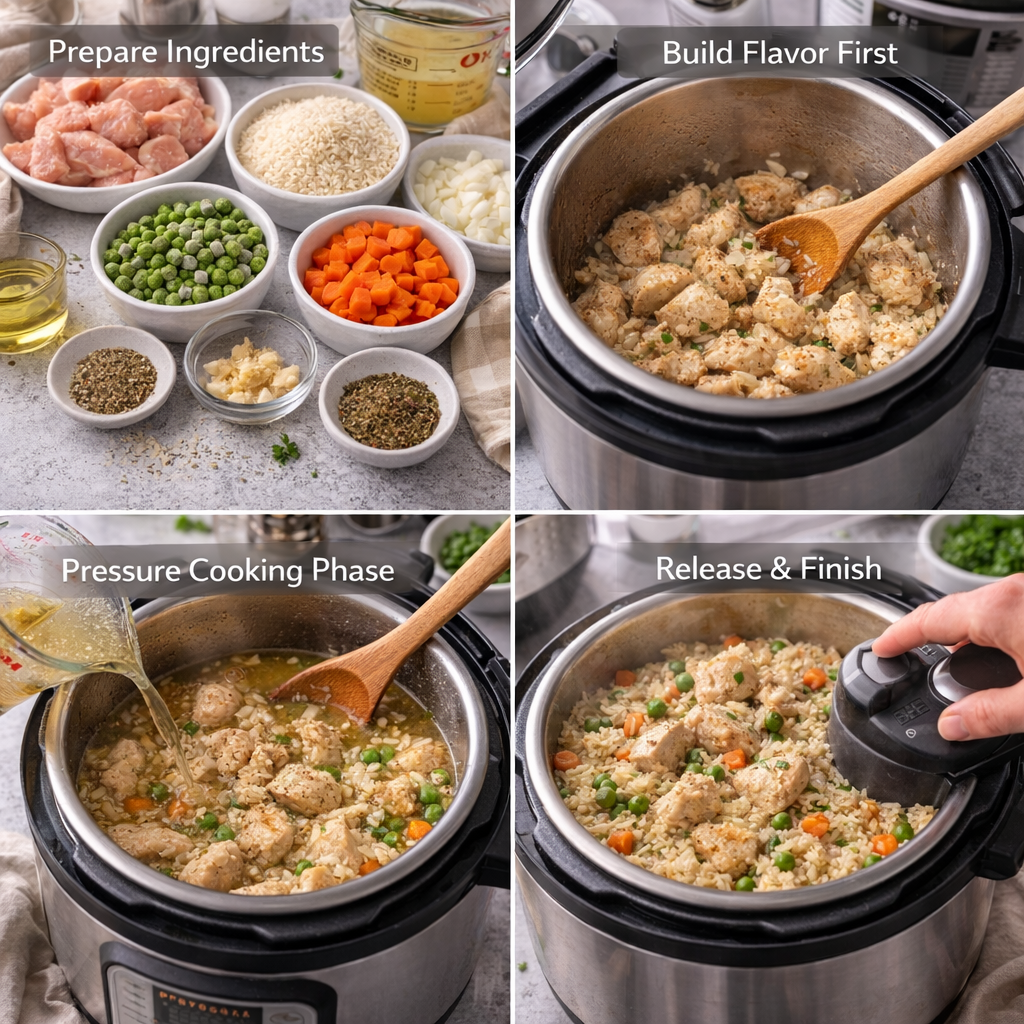
Prepare Ingredients
Rinse the rice until the water runs mostly clear. This step helps prevent gumminess later. Cut the chicken into evenly sized pieces and season lightly.
Build Flavor First
Turn on sauté mode. Heat oil, then cook onions and garlic until soft. Add the chicken and lightly brown it — this step adds depth and reduces the chance of sticking.
Pressure Cooking Phase
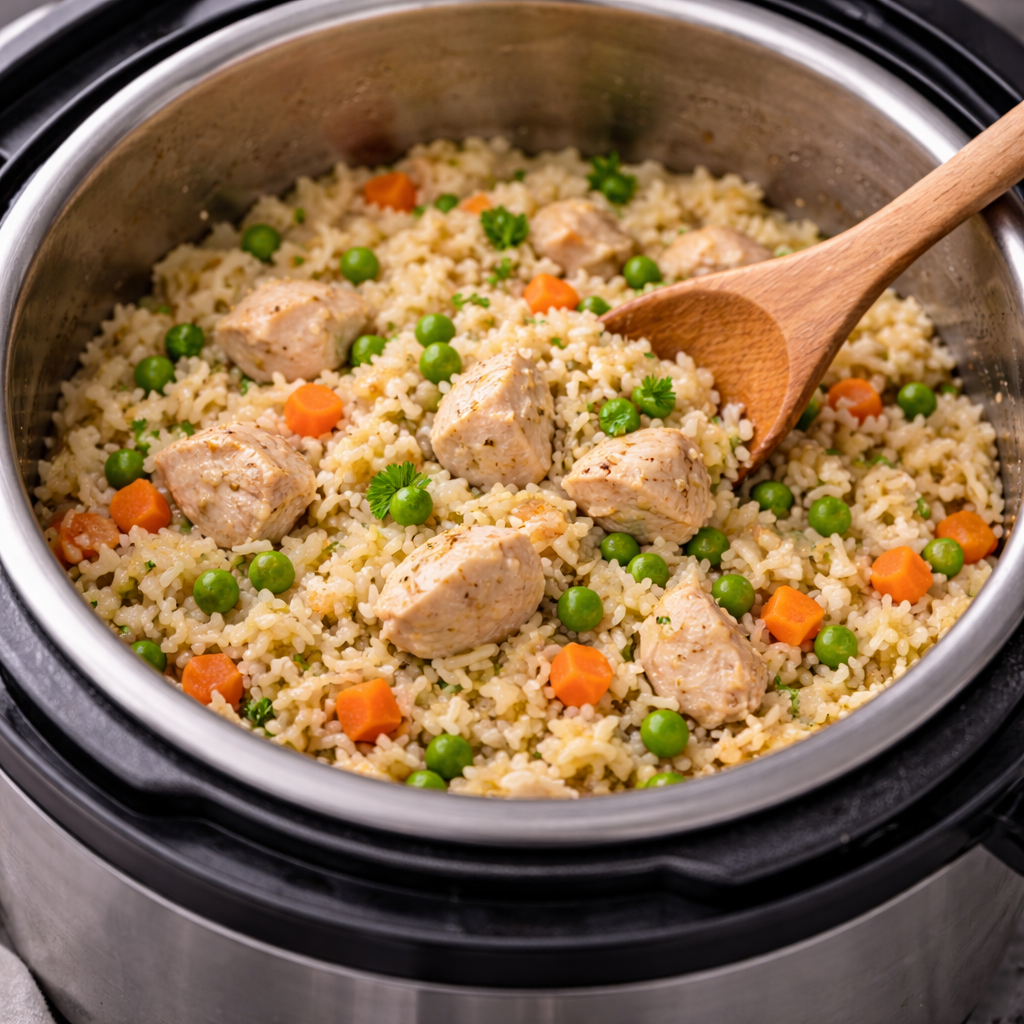
Stir in rice, vegetables, and broth. Make sure nothing is stuck to the bottom (this avoids burn warnings). Seal the lid, set to high pressure, and cook for the recommended time.
Release & Finish
Allow a short natural pressure release, then carefully open the lid. Fluff gently and let the rice rest for a minute to settle into the perfect texture.
Common Mistakes to Avoid
This is where many Instant Pot chicken and rice recipes go wrong:
- Skipping deglazing: stuck bits = burn notice
- Too much liquid: leads to mushy rice
- Quick-releasing too early: rice needs resting time
- Over-stirring after cooking: breaks rice grains
Following these small details makes a big difference in the final result.
Easy Variations Using What You Have
This recipe adapts easily without changing the core method:
- Add frozen vegetables for convenience
- Use chicken thighs for extra juiciness
- Adjust spices for mild or bold flavor
- Swap vegetables based on what’s in your fridge
It’s flexible enough to work as a budget-friendly dinner or a meal-prep option for busy weeks.
Storage, Reheating & Leftovers
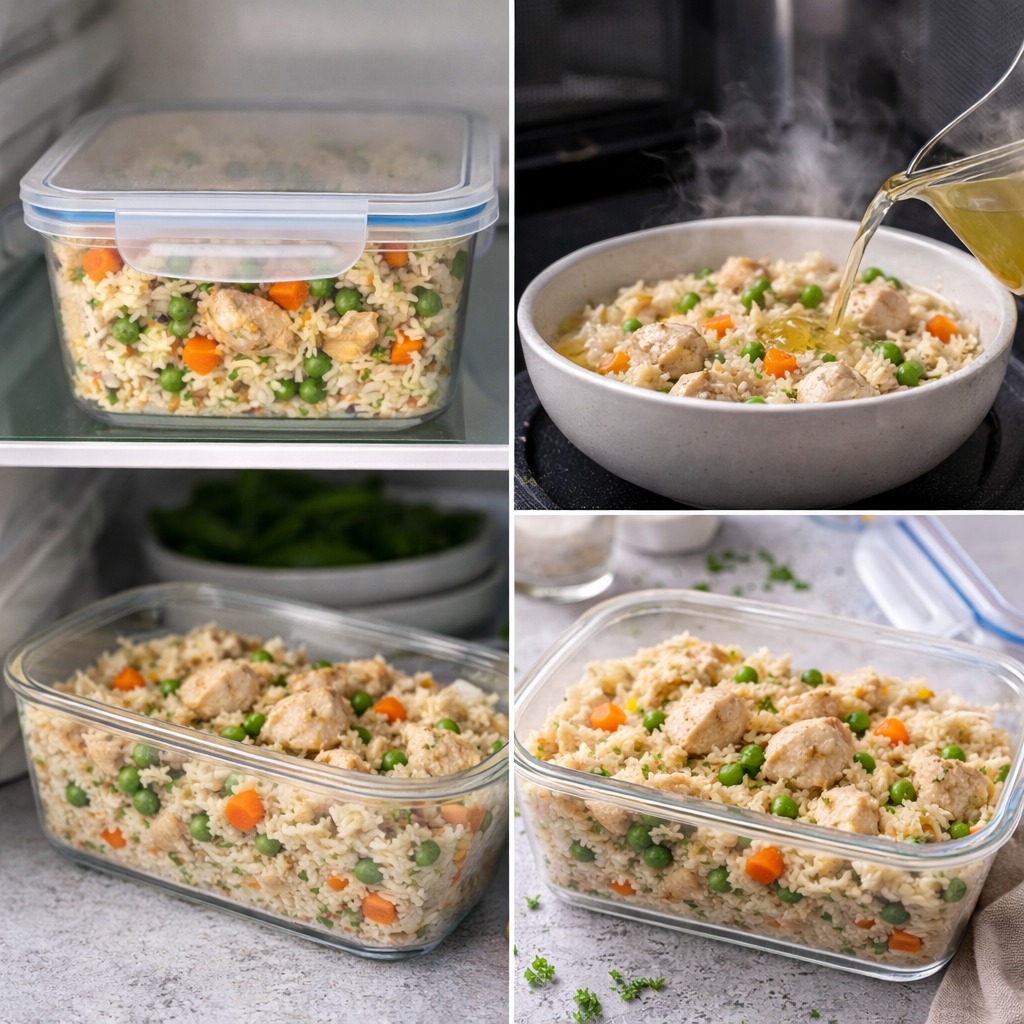
- Store leftovers in an airtight container in the fridge
- Reheat gently with a splash of broth to restore moisture
- Keeps well for a couple of days without drying out
This makes it ideal if you like cooking once and eating more than once.
Frequently Asked Questions
Can I use brown rice?
Yes, but it requires more liquid and a longer cook time.
Can I double the recipe?
As long as you stay below the fill line, it scales well.
What if my rice is slightly undercooked?
Seal and pressure cook for 2 more minutes with a short rest.
Final Thoughts
This Instant Pot chicken and rice recipe is designed to be dependable, comforting, and easy to repeat. It’s the kind of meal you make once, then come back to whenever you want something filling without extra effort.
Save it, customize it, and make it work for your routine, that’s what good home cooking is all about.
Instant Pot Chicken and Rice
Ingredients
Equipment
Method
- Prepare the IngredientsRinse the rice under cold water until mostly clear. Cut the chicken into evenly sized pieces and lightly season with salt and pepper.
- Build Flavor FirstTurn the Instant Pot to Sauté mode. Add oil or butter.Sauté the onion for 2 to 3 minutes until soft, then add garlic and cook for 30 seconds.Add chicken and cook just until lightly opaque on the outside (no need to cook through).
- Deglaze the PotPour in a small splash of broth and gently scrape the bottom to remove any stuck bits. This step helps prevent a burn notice.
- Pressure Cooking PhaseAdd the rinsed rice, remaining broth, carrots, peas, and seasonings. Stir gently to combine.Secure the lid, set the valve to Sealing, and pressure cook on High Pressure for 8 minutes.
- Release & FinishLet the pressure release naturally for 10 minutes, then carefully quick release any remaining pressure.Open the lid, fluff gently with a spoon, and let rest for 2 minutes before serving.
Nutrition
Notes
- Avoid stirring aggressively after cooking to keep the rice fluffy.
- If rice is slightly undercooked, reseal and pressure cook for 2 more minutes with a short rest.
- Always deglaze the pot before pressure cooking to avoid burn warnings.