Homemade yogurt might sound complicated, but this instant pot yogurt recipe makes the process surprisingly simple. Once you understand how fermentation works inside the pot, you can create smooth, probiotic-rich yogurt with only a few ingredients and very little effort.
Jump to RecipeWhen fermentation is complete, transfer the pot to the refrigerator or pour the yogurt into glass jars.
Refrigerate for at least 4 hours to allow the yogurt to set and thicken.Many people search for an instant pot yogurt recipe because they want a healthier alternative to store-bought yogurt. Making yogurt at home allows you to control ingredients, avoid unnecessary additives, and enjoy fresh yogurt whenever you want.
The Instant Pot maintains the ideal temperature needed for yogurt fermentation, making it easier than traditional stovetop methods. With just milk and a small amount of yogurt starter, you can produce a creamy batch of homemade yogurt in an Instant Pot that tastes better than most store brands.
What Makes Instant Pot Yogurt Different From Store-Bought Yogurt
Store yogurt is often produced in large factories and may contain stabilizers or thickeners. When you prepare yogurt at home, the fermentation process happens naturally, creating a fresh and clean flavor.
Homemade yogurt also allows you to adjust the texture. Some people prefer a mild and creamy yogurt, while others enjoy a thicker Greek-style consistency.
Another advantage is cost. A single batch of instant pot homemade yogurt usually costs far less than buying multiple containers at the grocery store. Once you learn how to make yogurt in an Instant Pot, it becomes a routine kitchen skill that saves money and produces healthier food.
Ingredients for Homemade Yogurt

You only need two ingredients to prepare this recipe.
- ½ gallon whole milk
- 2 tablespoons plain yogurt with live active cultures
Optional ingredients for flavoring:
- honey
- vanilla extract
- fresh fruit
Milk plays the biggest role in yogurt texture. Whole milk usually creates thicker yogurt, while low-fat milk produces a lighter consistency.
The yogurt starter provides the live cultures that transform milk into yogurt during fermentation.
Understanding the Yogurt Button on an Instant Pot
Many people are curious about what the yogurt function actually does. The yogurt setting keeps the contents of the pot at a warm and stable temperature that encourages bacterial cultures to grow.
When milk is heated and then cooled to the correct level, the yogurt starter begins converting lactose into lactic acid. This fermentation process thickens the milk and creates the familiar yogurt flavor.
The controlled environment inside the pot is the reason yogurt in an Instant Pot is easier than traditional methods.
Best Incubation Time for Creamy Yogurt
The length of incubation affects both flavor and thickness.
- 6 hours: mild flavor
- 8 hours: balanced taste and texture
- 10 to 12 hours: tangier yogurt
People experimenting with an instant pot yogurt step-by-step method often adjust incubation time to find the flavor they prefer.
If you enjoy slightly tart yogurt similar to Greek yogurt, allowing the mixture to ferment longer can produce deeper flavor.
Cold Start Instant Pot Yogurt
Another popular technique is the cold start yogurt method.
This shortcut works by using ultra-pasteurized milk that does not require the initial heating stage. The yogurt starter is mixed directly with the milk, and the Instant Pot incubates the mixture immediately.
The cold start approach is faster and often recommended for beginners learning how to make instant pot yogurt for the first time.
How to Make Thick or Greek-Style Yogurt
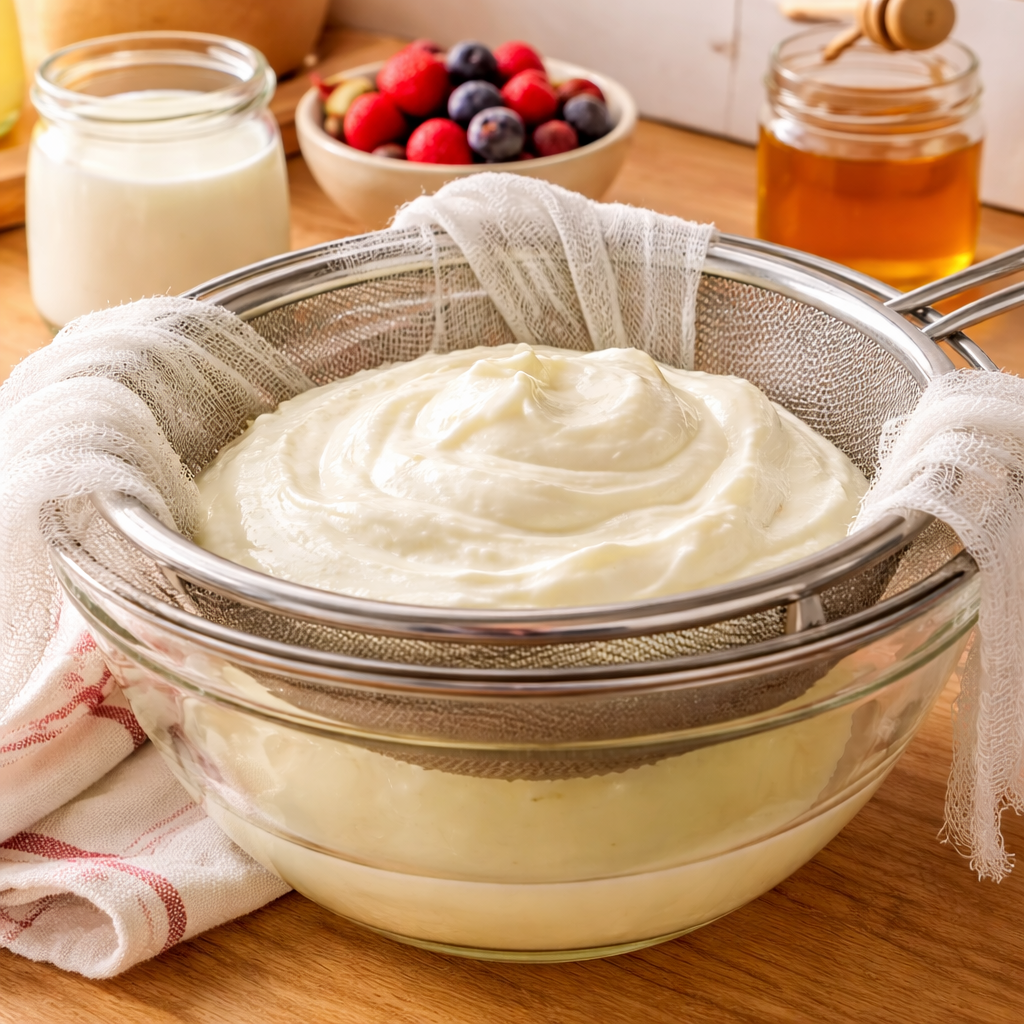
Some people prefer thick yogurt similar to Greek yogurt. This can be achieved by removing whey.
Place the finished yogurt into a strainer lined with cheesecloth and allow the liquid whey to drain for one to two hours.
This process concentrates the yogurt and produces a richer texture.
Many people searching for how to make thick yogurt in an Instant Pot use this straining method to achieve the desired consistency.
Yogurt Texture and Flavor Adjustments
If you want to experiment with flavors, homemade yogurt offers many options.
For creamier yogurt:
- use whole milk
- incubate slightly longer
For milder yogurt:
- shorten fermentation time
Flavor variations may include:
- vanilla yogurt
- honey yogurt
- fruit yogurt
Adding flavors after fermentation keeps the yogurt cultures active and healthy.
Health Benefits of Homemade Yogurt
Fresh yogurt contains probiotics that support digestive health. These beneficial bacteria help balance the gut microbiome and may improve digestion.
Homemade yogurt is also rich in protein and calcium. Because it is made from simple ingredients, it avoids many additives found in commercial yogurt products.
Many people interested in a probiotic yogurt recipe prefer making yogurt at home for this reason.
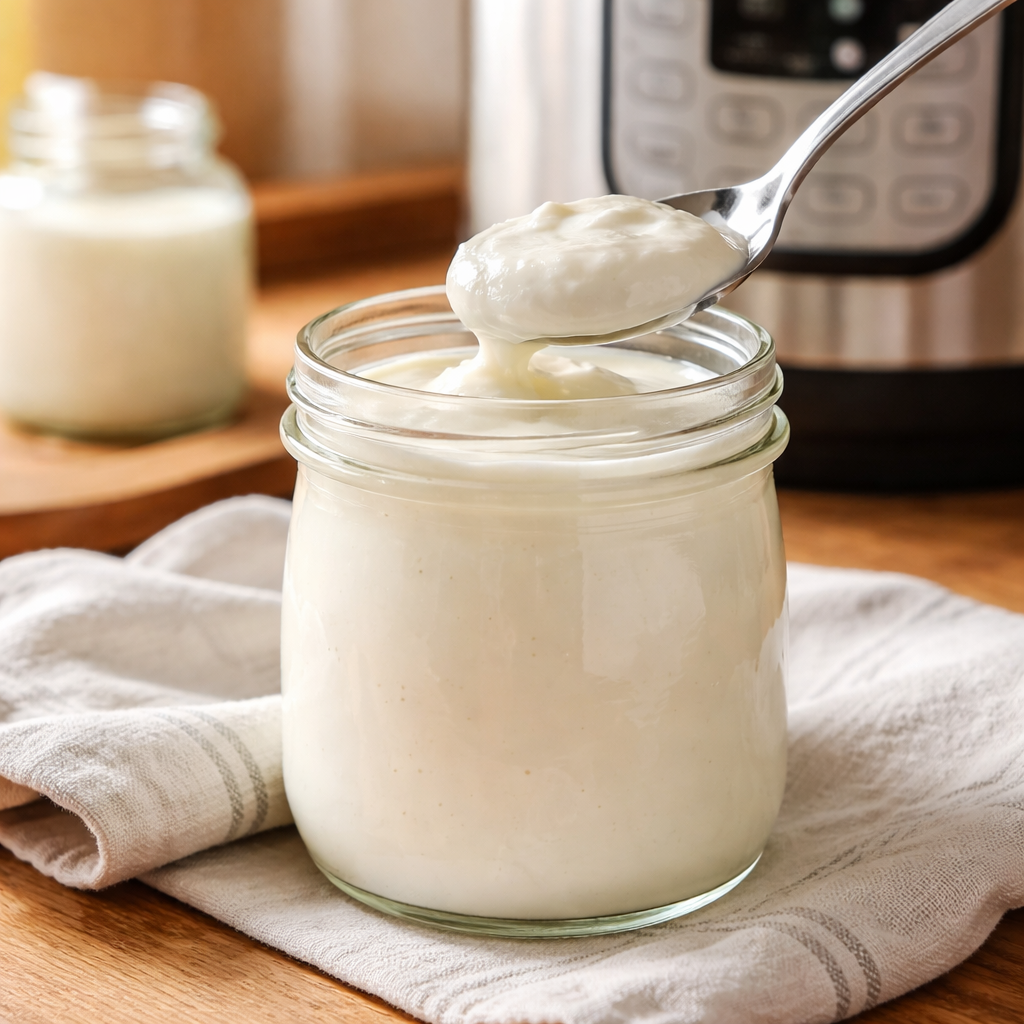
Storage Tips for Fresh Yogurt
Homemade yogurt should be stored in airtight containers in the refrigerator.
It typically remains fresh for 7 to 10 days.
Glass jars work especially well because they prevent odor absorption and maintain the yogurt’s flavor.
You can also save a few tablespoons from each batch to use as the starter for your next yogurt recipe.
Common Mistakes When Making Yogurt
If your yogurt does not turn out perfectly the first time, small adjustments usually solve the problem.
Runny yogurt
This often happens when milk did not reach a high enough temperature before fermentation.
Grainy texture
Starter may have been added when the milk was still too hot.
Yogurt too sour
Fermentation lasted too long.
Learning these small details helps beginners master the process of making homemade yogurt in an Instant Pot.
Frequently Asked Questions
How long should yogurt ferment in an Instant Pot?
Most yogurt incubates between 8 and 10 hours, depending on the flavor you prefer.
Can yogurt be made without a starter?
A small amount of yogurt with live cultures is needed to begin fermentation.
What milk works best for yogurt?
Whole milk usually creates the creamiest texture.
Final Thoughts
Making yogurt at home may seem intimidating at first, but once you understand the process, it becomes surprisingly simple. The Instant Pot removes much of the guesswork by maintaining the correct fermentation temperature.
With only a few ingredients and some patience, you can produce smooth and delicious yogurt that rivals store-bought versions. Whether you prefer mild yogurt, thick Greek yogurt, or flavored variations, this Instant Pot yogurt recipe is an easy way to bring fresh probiotic yogurt into your kitchen.
Instant Pot Yogurt Recipe
Ingredients
Equipment
Method
- Pour the whole milk into the Instant Pot insert.Press the Yogurt button and select the Boil setting.Allow the milk to heat until it reaches 180°F (82°C).
- Once the milk finishes heating, remove the insert or allow it to cool inside the pot.Let the milk cool down to about 110°F (43°C) before adding the yogurt starter.
- Place 2 tablespoons plain yogurt in a small bowl.Add a few tablespoons of warm milk and whisk until smooth.Pour this mixture back into the Instant Pot and whisk gently to combine.
- Close the Instant Pot lid.Press the Yogurt function again and set the incubation time for 8 to 10 hours depending on how tangy you prefer the yogurt.
- When fermentation is complete, transfer the pot to the refrigerator or pour the yogurt into glass jars.Refrigerate for at least 4 hours to allow the yogurt to set and thicken.
- For thicker yogurt, place the yogurt into a fine mesh strainer lined with cheesecloth.Set the strainer over a bowl and allow the whey to drain for 1 to 2 hours until the yogurt reaches your desired thickness.
Nutrition
Notes
• Longer fermentation creates tangier yogurt.
• Save 2 tablespoons of yogurt from your batch to use as a starter for the next batch.
• For flavored yogurt, stir in honey, vanilla, or fruit after refrigeration.