Chocolate pudding is one of those timeless desserts that instantly feels comforting. This easy homemade chocolate pudding is rich, smooth, and deeply chocolatey, without relying on boxed mixes or artificial flavors. Best of all, it comes together on the stovetop in under 30 minutes, making it perfect for weeknights, last-minute desserts, or a simple treat for kids and family.
Jump to RecipeIf you’ve ever wondered how to make chocolate pudding from scratch that’s creamy and lump-free, this recipe walks you through it step by step using simple pantry ingredients.
Why This Chocolate Pudding Is Better Than Boxed Mixes
Homemade chocolate pudding gives you full control over flavor, sweetness, and texture. Instead of tasting overly sweet or artificial, this version delivers a smooth and creamy pudding with real cocoa and chocolate.
Here’s why it works so well:
- Balanced richness without being heavy
- Thick, silky texture that sets perfectly
- No baking, no oven, no complicated steps
- Easy to customize for different dietary needs
This classic dessert proves that simple homemade desserts often taste better than store-bought options.
Quick Recipe Snapshot
- Prep time: 5 minutes
- Cook time: 10 to 12 minutes
- Cooling time: 10 minutes
- Total time: Under 30 minutes
- Skill level: Beginner
- Method: Stovetop
- Servings: 4
Ingredients You’ll Need
- Milk (whole milk gives the creamiest result)
- Cocoa powder (unsweetened)
- Sugar
- Cornstarch (for thickening)
- Dark chocolate (chopped)
- Vanilla extract
- Pinch of salt
Each ingredient plays a role, cocoa powder builds deep chocolate flavor, cornstarch creates structure, and dark chocolate adds richness and gloss.
30-Minute Chocolate Pudding Method
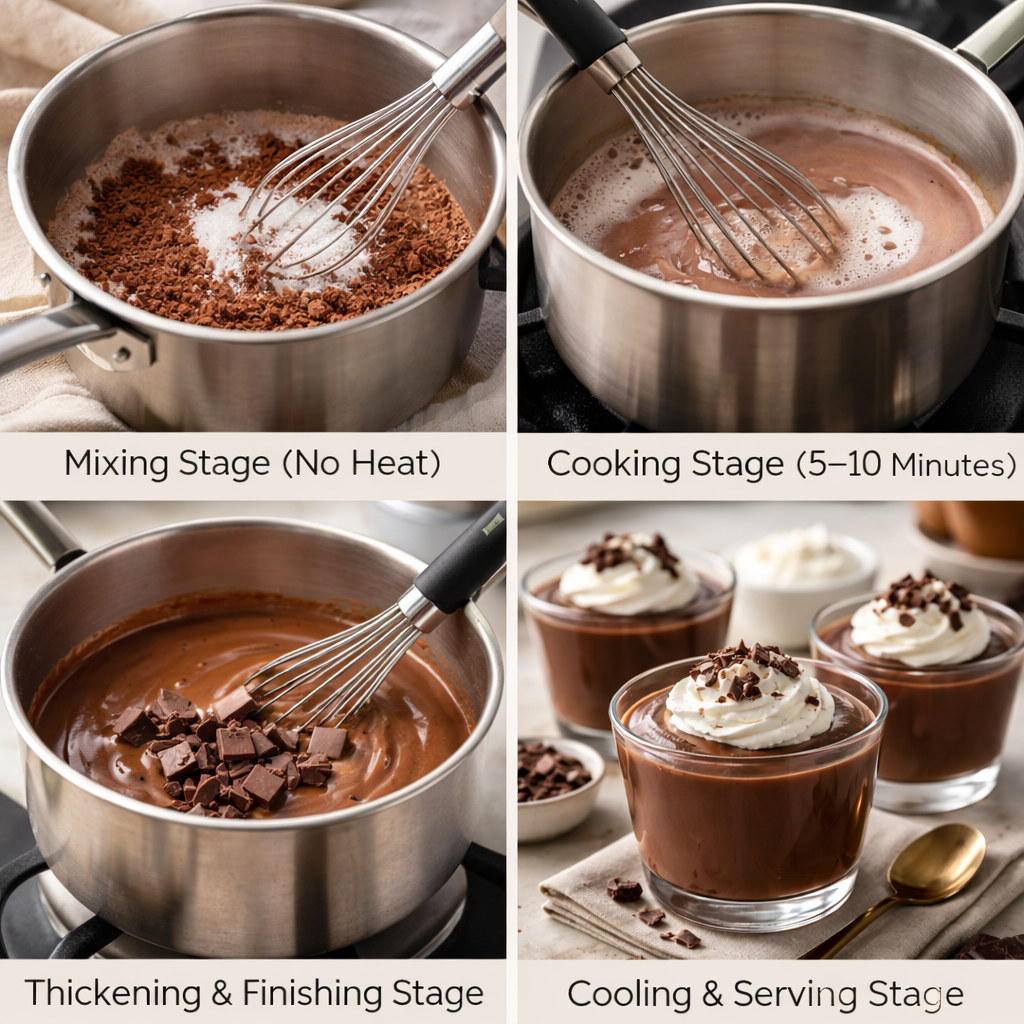
Mixing Stage (No Heat)
In a saucepan, whisk together cocoa powder, sugar, cornstarch, and salt until evenly combined. This prevents lumps later.
Cooking Stage (5 to 10 Minutes)
Gradually whisk in the milk. Place the pan over medium heat and stir continuously as the mixture warms and begins to thicken.
Thickening & Finishing Stage
Once the pudding bubbles gently and coats the back of a spoon, remove it from heat. Stir in chopped dark chocolate and vanilla extract until smooth and glossy.
Cooling & Serving Stage
Pour into serving bowls or dessert cups. Let cool slightly before serving warm, or chill for a thicker, classic chocolate pudding texture.
How to Get a Perfectly Smooth Pudding
A silky texture is all about technique:
- Whisk constantly while heating
- Keep the heat at medium, not high
- Add chocolate after removing from heat
- If small lumps appear, whisk vigorously or strain
The pudding will continue to thicken as it cools, so avoid overcooking.
Flavor & Dietary Variations
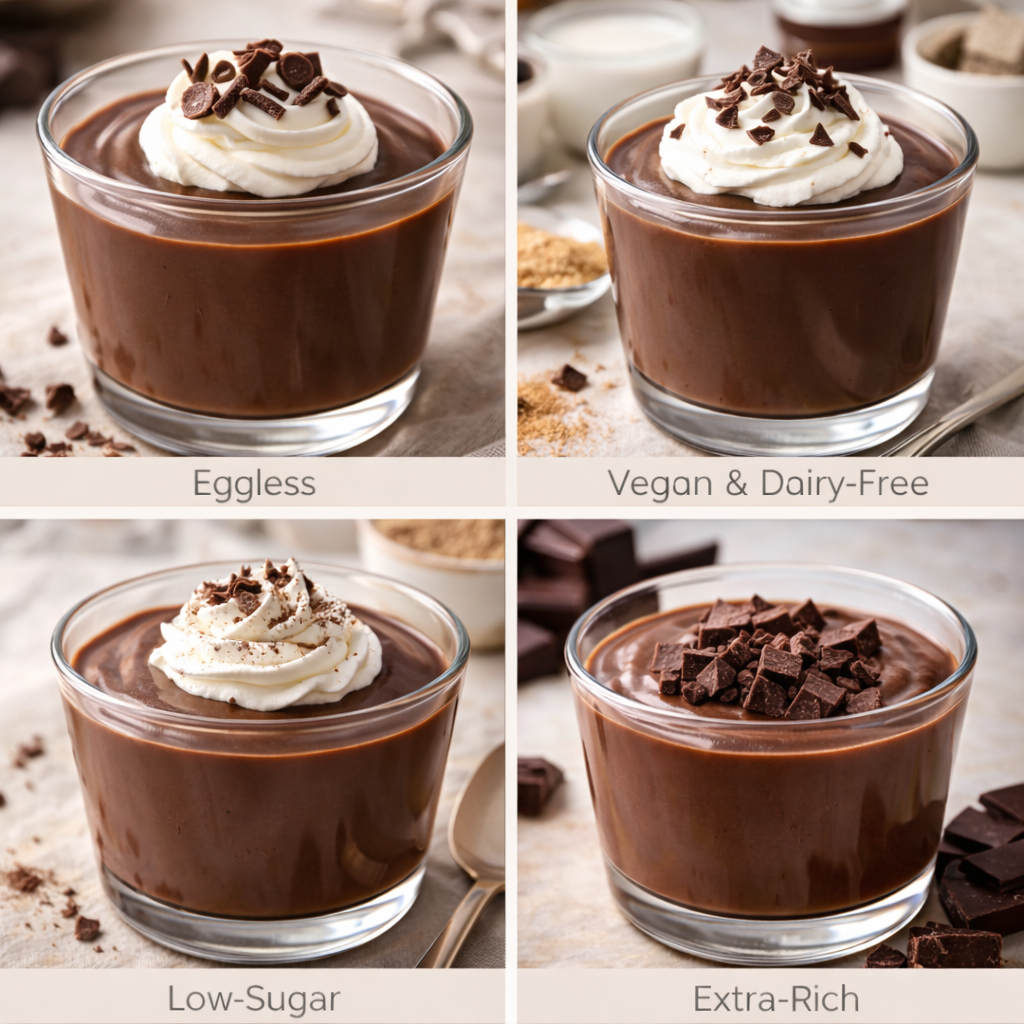
This recipe adapts easily:
- Eggless chocolate pudding: This recipe already is egg-free
- Vegan & dairy-free: Use plant-based milk and dairy-free chocolate
- Low-sugar option: Reduce sugar and rely on dark chocolate for richness
- Extra-rich version: Increase chocolate slightly for a deeper flavor
These variations make it suitable for different preferences without sacrificing texture.
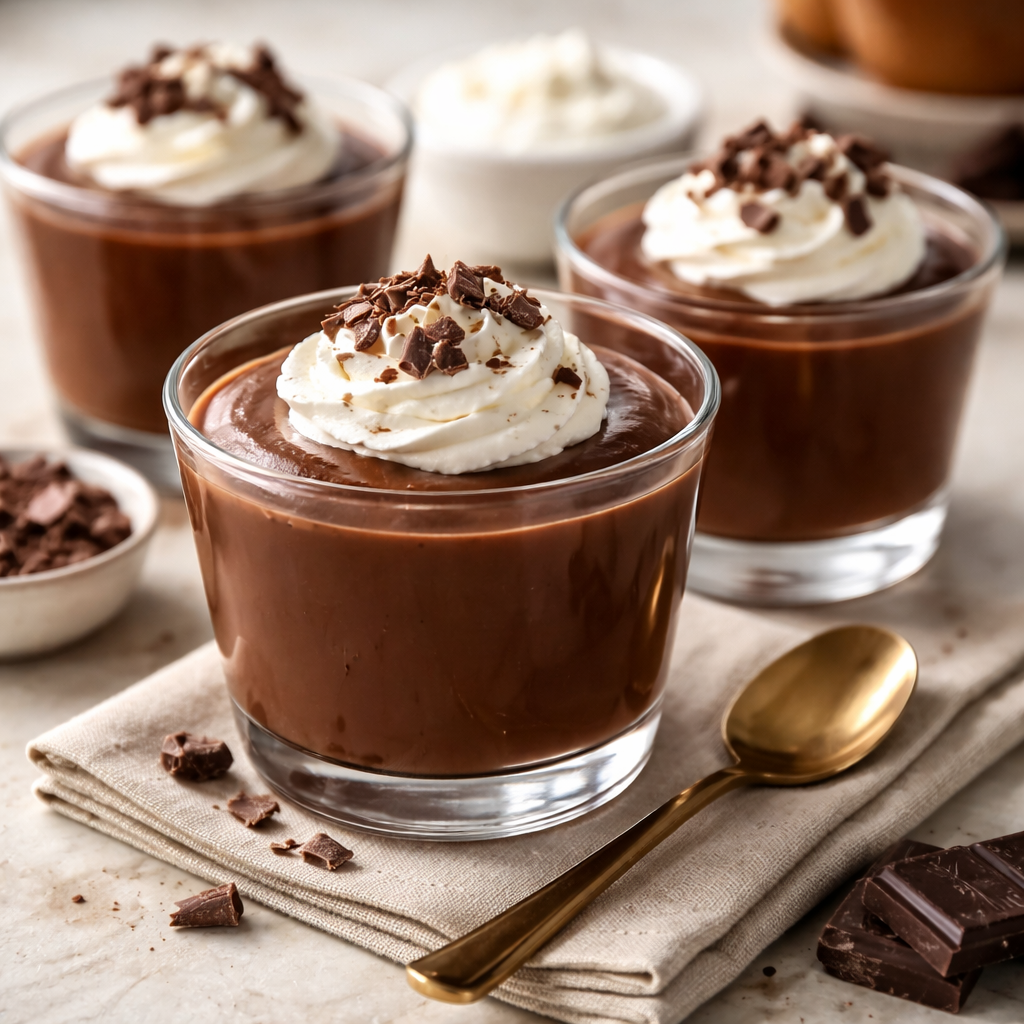
How to Serve Chocolate Pudding
Chocolate pudding can be served in many ways:
- Classic dessert cups
- Layered parfaits with whipped cream
- Kid-friendly snack bowls
- Party dessert glasses with garnishes
It works beautifully as both a casual treat and an elegant dessert.
Make-Ahead, Storage & Shelf Life
- Store covered in the refrigerator for up to 3 days
- Press plastic wrap directly onto the surface to prevent skin
- Texture thickens more after chilling
- Freezing is not recommended, as it affects consistency
This makes it a great make-ahead dessert for busy days.
Troubleshooting Guide
- Too runny: Cook slightly longer while stirring
- Too thick: Whisk in a splash of milk
- Lumps: Whisk off heat or strain
- Skin forming: Cover surface while cooling
Chocolate Pudding FAQs
Can I make chocolate pudding without eggs?
Yes. This recipe is naturally egg-free and thickened with cornstarch.
How do you thicken chocolate pudding?
Cornstarch thickens the mixture as it heats and sets further while cooling.
Can this be made dairy-free?
Absolutely. Plant-based milk works well with the same method.
How long does homemade chocolate pudding last?
Up to three days when refrigerated properly.
Final Thoughts
This easy chocolate pudding recipe shows that a comforting, homemade dessert doesn’t have to be complicated or time-consuming. With a smooth texture, deep chocolate flavor, and flexible variations, it’s a recipe you’ll come back to again and again.
Chocolate Pudding
Ingredients
Equipment
Method
- Mix the dry ingredientsIn a medium saucepan, whisk together the sugar, cocoa powder, cornstarch, and salt until evenly combined and lump-free.
- Add milkSlowly pour in the milk while whisking continuously to create a smooth mixture.
- Cook the puddingPlace the saucepan over medium heat. Cook, whisking constantly, for 5 to 10 minutes until the mixture thickens and begins to gently bubble.
- Finish with chocolateRemove the pan from heat. Stir in the chopped dark chocolate and vanilla extract until fully melted and the pudding looks glossy and smooth.
- Cool and servePour the pudding into serving bowls or dessert cups. Let cool slightly before serving warm, or refrigerate for a thicker texture.
Nutrition
Notes
- The pudding will continue to thicken as it cools.
- If lumps form, whisk vigorously or strain before serving.
- For extra shine, stir gently after adding chocolate rather than beating.